How to use EQ for Mixing? | ‘From 0 to DJ’ #8 ✅
In this chapter we will learn how to use equalizers during mixing. Making proper use of them will give a lot of elegance to your mixes. It will help you achieve a virtually seamless transition between tracks. 🙂
You must keep in mind that this cannot be understood as something strict and closed, as in all the arts, creativity must always have a place, but to begin with we advise you to learn to do it this way.
1. What does equalization mean?
Equalization is the stimulation or attenuation of sound, fragmented in frequency intervals, now we will see what this means.
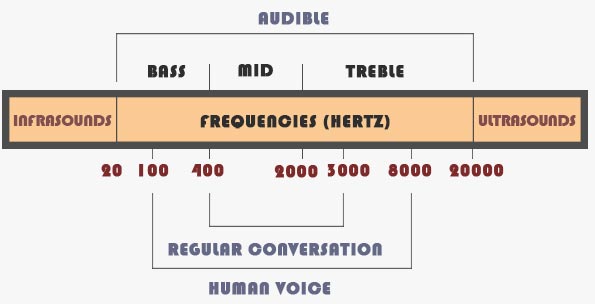
The human being can appreciate from 20 Hz (the lowest) to 20,000 Hz or 20 KHz (the highest). We call this whole range of hertz the audible spectrum.

2. What are the 3 Equalization knobs on a Mixing Console?
Now we are going to divide the audible spectrum into 3 parts.
As a result of this division we will have 3 ranges of sounds: Treble, Mid and Bass. As we can see in the image above.
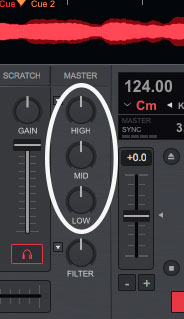
Mixing consoles have a module dedicated precisely to stimulate or reduce each of these 3 parts of the frequency division.
Normally we will find it as HI(HIGH), MID and LOW [Treble, Mid and Bass]. Each interval has its corresponding knob with which we can regulate the sound independently for each channel.

3. Basic EQ Mixing Technique: How to use it during mixes
It must be said that at the moment of applying this technique, we must have the tracks already synchronized in phrase and beat, something that we would have achieved without emitting sound from the pre-listening with the headphones (which we will see in the next chapter).
To proceed to mix the sound we must differentiate 2 Roles of the tracks. One for the track that is already playing and one for the incoming track.
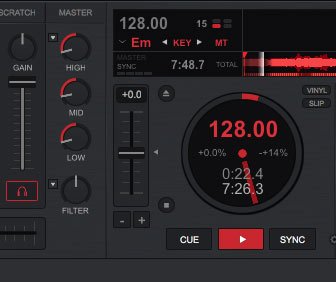
A. The track that is already playing (Track A): In a normal reproduction, in which we do not want to achieve any effect, the position of the equalizers will be neutral, i.e. all the knobs will be pointing to the center.
B. The incoming track (Track B): On the contrary, it is advisable to modify the frequencies of the incoming track. We will start by attenuating them.
STEP 1: Attenuate the frequencies of track B.
This is done by pointing the three knobs to the left without reaching the limit.

STEP 2: Start the transition between tracks
To make the transition as seamless as possible, follow the guideline below:
- Slightly increase one frequency range of track B.
- Slightly decrease the same range of frequencies of track A.
Repeat this operation little by little and with the 3 frequency ranges, as many times as necessary until we achieve that the positions of the knobs of track B are neutral and those of track A are attenuated. Do this trying that the end of this technique coincides with the end of the phrase.

If you had the tracks well synchronized and you execute this technique in a progressive way and in the corresponding times, you will make a perfect transition.
If you want to achieve a subtle transition it is important that you do it by giving small nuances instead of abrupt changes.
Something to keep in mind: ⇒ The Sum of total volume ⇐
This would disturb or cause distorted sound to be emitted from the speakers when two tracks are playing simultaneously. We will also try to avoid imbalances in the frequencies, as for example disproportionate sums in the bass when sounding two kick drums at the same time.
Another goal will be to give art to the mixing process, each one looking for his own style and methods.
Now it’s your turn 👇
In this chapter we have seen a basic way of how to use equalizers in a mixer or DJ software, plus we have learned something about sound and frequencies.
As always we recommend that you practice a lot and slowly find your own method. In my beginnings I was not very strict with this, because when I started I didn’t have speakers that emitted the sound well balanced, and I was adding more bass than necessary to try to compensate…
In the next chapter we will talk about the use of headphones during the mix: pre-cueing or pre-listening, how to do it and what it is for. Something very useful and that takes the DJ experience to the next level.
‘From 0 to DJ’ – IndexHow did it go? What do you think about this basic way of us? Do you know more strategies? Let us know in the comments.
Best regards and see you in the next one! 🙂
Share with other DJs!

I analyze software, plugins, and AI tools for music and audio.


Leave a Reply