How to use Loops when Mixing? | ‘From 0 to DJ’ #11 ✅
In this chapter we are going to see what Loops are, how we can use them during mixing, some looping transition situations and the 2 ways to create them: Manual and Automatic. 🙂
1. What is a LOOP?
A loop is a continuous repetition of a portion of the track. We choose where we want it to start and where we want it to end. We can leave the loop at any time we want or modify it live, shortening or lengthening it.

2. How to create a Loop?
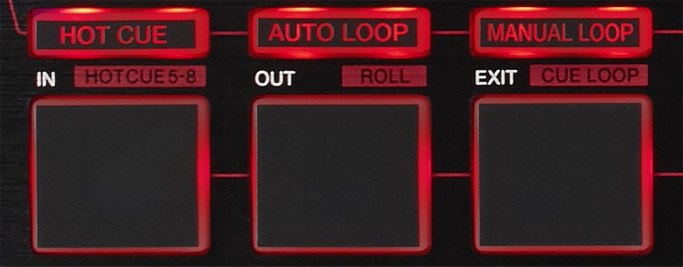
In most software, controllers and players there are two buttons, called IN / OUT.
The function of these buttons is to mark the start point and the end point of the loop.
OUT= loop end point.
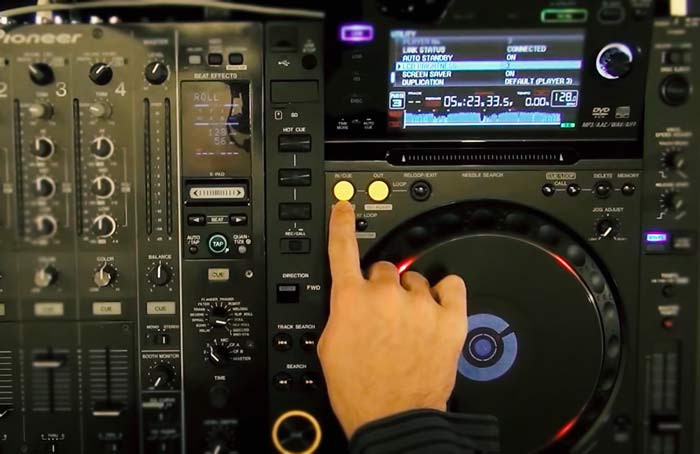
To exit loops, in some controllers or software such as Virtual DJ the OUT button itself also acts as EXIT. In others like some Pioneer, there is a third button that is usually called EXIT. As in the following image:

Normally we will make the loops respecting the bars. Remember that as we have seen in the chapters about the structure of music:
1 bar = 4 beats

2.1 Table of Loops and their duration
The bar will be our reference and from it we will handle with the doubles and halves. So, starting from the 4 beats as reference we can create loops by multiplying it by 2 or dividing it by 2:
4 beats
8 beats –> 4×2
16 beats –> 8×2
32 beats –> 16×2
2 beats –> 4:2
1 beat –> 2:2
1/2 beat –> 1:2
1/4 beat –> 1/2:2
1/8 beat –> 1/4:2
1/16 beat –> 1/8:2
1/32 beat –> 1/16:2
2.2 Creating a LOOP manually
Creating a loop manually and accurately, requires some practice, but it is advisable to know how to do it because sometimes the software can analyze incorrectly the beats of the song.
But you don’t have to worry because you can correct it, that is to say that even if you don’t make it perfect there are some controls to enlarge or reduce that loop.
Let’s see the steps to create a loop of 4 beats:
- Press IN
- Count the beats from 1 to 4, but going all the way to the beginning of the 5th beat.
- “1 – 2 – 3 – 4 – and” Press OUT on that “and”, at that start of the 5th beat.
1 – 2 – 3 – 4 – and
IN OUT
As for the controls to correct and modify the loops, it is similar in all programs, let’s see for example how it is done in Virtual DJ:

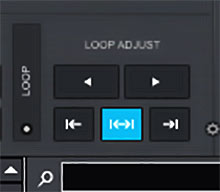
In the loop module, if you clic on ‘Loop’ label on the left side, you access the LOOP ADJUST, there are 3 buttons represented by different arrow symbols:
- Arrow to the left: modifies the loop start position (Modifies the IN).
- Arrow to both sides: moves the whole loop along the track, keeping its size.
- Arrow to the right: modifies the end position of the loop (Modifies the OUT).
Once you activate any 3 of the buttons, the modifications can be made by moving the Jog by turning it in one direction or another depending on what you want to do, in Pioneer controlers and players it is very similar.
The best way to understand this is to try it.
2.3 Creating a LOOP automatically
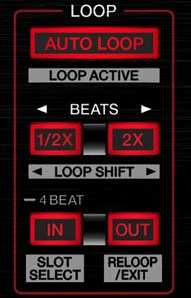
To generate them automatically, look for the loops module, it is usually quite intuitive. Select the number of beats you want and press (it may change a little from one controller/table to another, but the concept is the similar).
The instant we press a loop will be created with the indicated length of beats.

In Virtual DJ you select the number of beats, press, and the loop is automatically created. And using the left and right arrows, you increase or decrease the loop, multiplying or dividing by 2. As indicated in the table of point 2.1.

3. How to use LOOPs when mixing and what for?
There are several typical cases in which the use of the loop can be helpful. Let’s see them:
CASE 1: Mixing late
For example when you have overdone the phrase (musical structure) and you don’t have time to mix in a natural way, you can lengthen the track. The loop will get you out of trouble and you will be able to mix perfectly without the outgoing track stops playing before the incoming track has the necessary presence.
CASE 2: Music without Extended
As we said in the chapter on how to learn to mix music, we do not advise you to use this type of tracks to learn to DJ, but once you have a certain level, you may want to mix with some different songs and without the extended structures (the phrases of 32 or 64 beats at the beginning and end, essentially rhythmic and without much melody, which facilitate the progressive mixing).
For these cases you can create your own live extended phrases. However, you will need at least a few seconds at the beginning, only instrumental and very rhythmic, so that you can loop them.
CASE 3: Creativity and Freestyle
You can do thousands of tricks mixing loops, such as using them to generate more emphasis on the climbs… That’s up to your creativity, training and skill. But I guarantee that by researching, looking at examples and practicing you will be able to do wonders if that’s what you are interested in.
Now it’s your turn 👇
In this chapter we have learned how to use Loops, as well as the two ways to create them. As always: practice, practice and practice.
In the next chapter we will see very interesting exercises to improve your skills.
If you have followed all the chapters of the ‘From 0 to DJ’ series at this point, we can say that you already know the functions and have the most essential theoretical bases of the DJ world, so congratulations! you are a little closer to the point you want to get to.
‘From 0 to DJ’ – IndexHow did it go? Do you want to share any interesting tricks to do with Loops? Let us know in the comments.
Best regards and see you in the next one! 🙂
Share with other DJs!

I analyze software, plugins, and AI tools for music and audio.


Leave a Reply